
Writing this all down for next time.
This blog post is part blog post, part documentation for myself so that the next time I do this I remember how it all works (again).
Periodically it's helpful to record a new device enrollment/setup experience for demos, presentations, documentation, or just to share with others. In the olden days I used to spin up VMs to make demos and could easily grab screenshots or screen recordings with QuickTime from the VMs, but Apple Silicon has made that very difficult to do (especially when automated enrollment is involved.
Taking your test Mac and plugging into your host Mac to record doesn't work; the connection isn't picked up as an external video source. You need an external capture card to route that connection through so your recording device acknowledges the video feed. Enter the Elgato Game Capture HD60S+ (I believe the current model is HD60 X.) It's mainly designed for folks that livestream while they play games, but it's equally handy for capturing live video from an external Mac to make videos.
What you need:
- An Elgato HD60 S+/X, or comparable external capture card
- A host Mac you want to use to capture and record the video
- A test/guest Mac you are capturing video from
- HDMI to USB-C adapter (I tend to stick with the multiport adapter from Apple)
- One HDMI cable
- One USB-C cable
Use the USB-C adapter to connect the HDMI cable to the test Mac, and plug that HDMI cable into the IN HDMI port on the capture card.
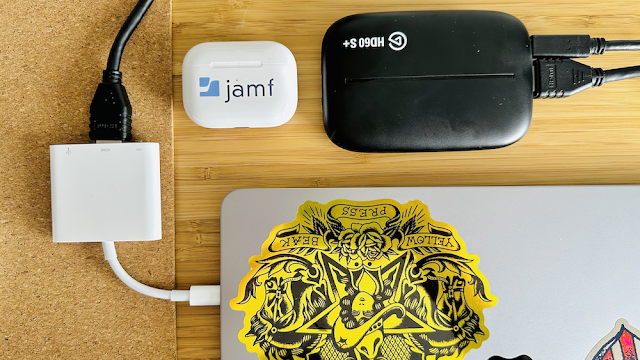 |
| USB-C adapter with connected HDMI cable plugged into the test Mac, with other end of HDMI cable plugged into the capture card. |
 |
| HDMI and USB-C cables plugged into capture card. |
Use the USB-C cable to plug into the side that says IN and connect to the host Mac (the Mac being used to capture the video.
Next power up the test Mac. Go through the first few steps of Setup Assistant to select a language and region. These steps are important because they determine the keyboard layout you want to use.
Once you do that you can open QuickTime or another media capture app and see if you get a signal. Chances are at this point you do but all you'll see is a blurry background image.
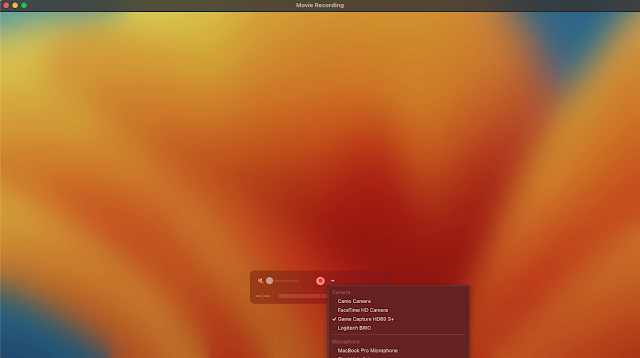 |
| Video feed from the test Mac in QuickTime on the host Mac, with Game Capture HD60 S+ selected as the camera for the movie recording. |
If you press Command+F1 the display should flip from extended display (which is what macOS will default to when a new display is detected) to mirrored.
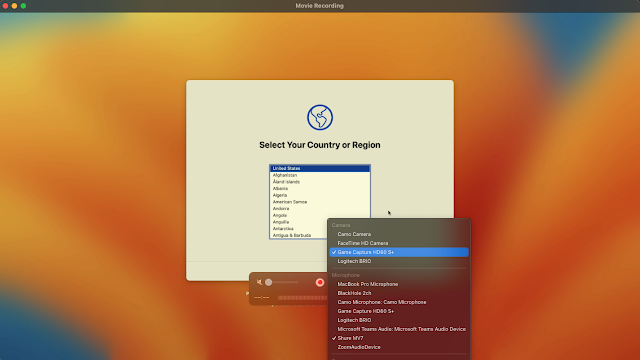 |
| The capture card now feeds a mirrored display, so that the recording shows what is displayed on the test laptop. |
You can also press Control+Option+Command+t at this stage to pull up a Terminal window. This brings up a menubar where you can get to Control Center and see your mirroring options, as well as the Apple Menu to get into System Settings > Displays adjust color profile, resolution, and other available display settings.
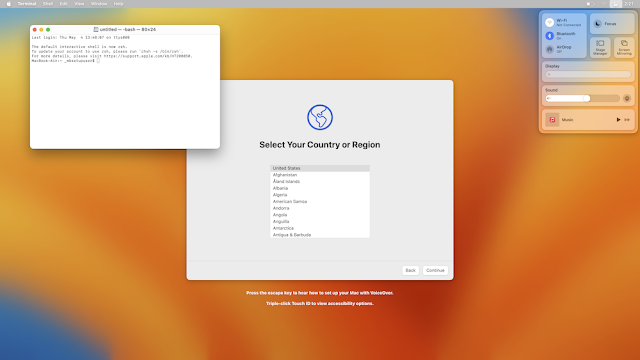 |
| Setup Assistant after using the keystroke to open Terminal, which displays the menubar for additional UI options in Control Center. |
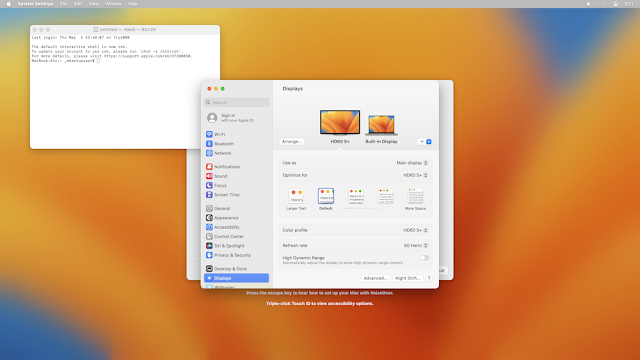 |
| Access to the menubar also makes the Apple menu accessible, which lets you go into System Settings and make additional display adjustments. |
Once everything is set up the way you want, just hit record and do your thing. Afterwards you'll have a "live" video recorded from a "real" Mac that you can use for whatever you need.
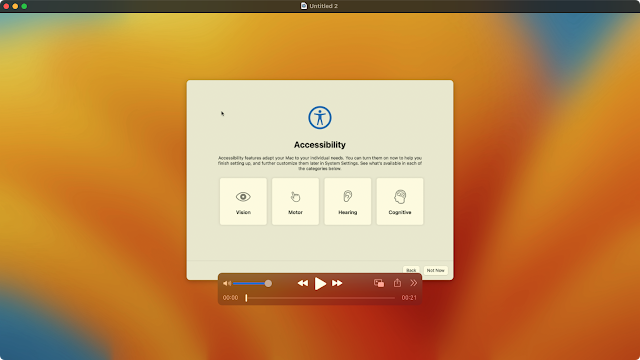 |
| QuickTime video example, recorded from the test Mac via an external capture card. |
If you need to do it again, or use the test Mac for something else, a quick Erase all contents and settings from System Settings will get it back to a vanilla state in a few minutes. Easy button.
I go long enough between needing to do this that I always forget something, usually what ports and cables to use with the capture card. 🤷🏻♀️ This is why we document things!
☮️❤️👩🏻💻
| ℹ️ | If you take a video capture using this setup and notice a yellow cast to the recording try turning off True Tone on the connected computer. |
Write a comment
Post a Comment