
Quickly test and reset on a physical testing Mac with local snapshots.
While I've posted quite a bit about the joys of building VMs for testing, testing with an actual Mac in your hands is always a good idea. VMs are representations of what a physical device will do, and sometimes you really need the real thing to understand what a workflow will look like to a real person using a Mac at your organization.
Fortunately there is an easy way to quickly reset a Mac to a blank state without wiping the drive and reinstalling the full OS. As long as you're testing on an APFS Mac (so, High Sierra or Mojave) you have the tmutil command available to quickly make snapshots that you can use to restore to within 24 hours. And you can run tmutil from the Terminal in Setup Assistant, which means you can get yourself back to a true vanilla state of the OS without reformatting by doing the snapshot before you even get through all of Setup Assistant.
Here's what that looks like:
1. Start with a fresh Mac that hasn't gone through Setup Assistant yet. You can get it in this state however you prefer; the native option here is to boot into Recovery, wipe the drive, and reinstall macOS fresh.
2. Boot up the Mac and let it start Setup Assistant. Select your region and keyboard.
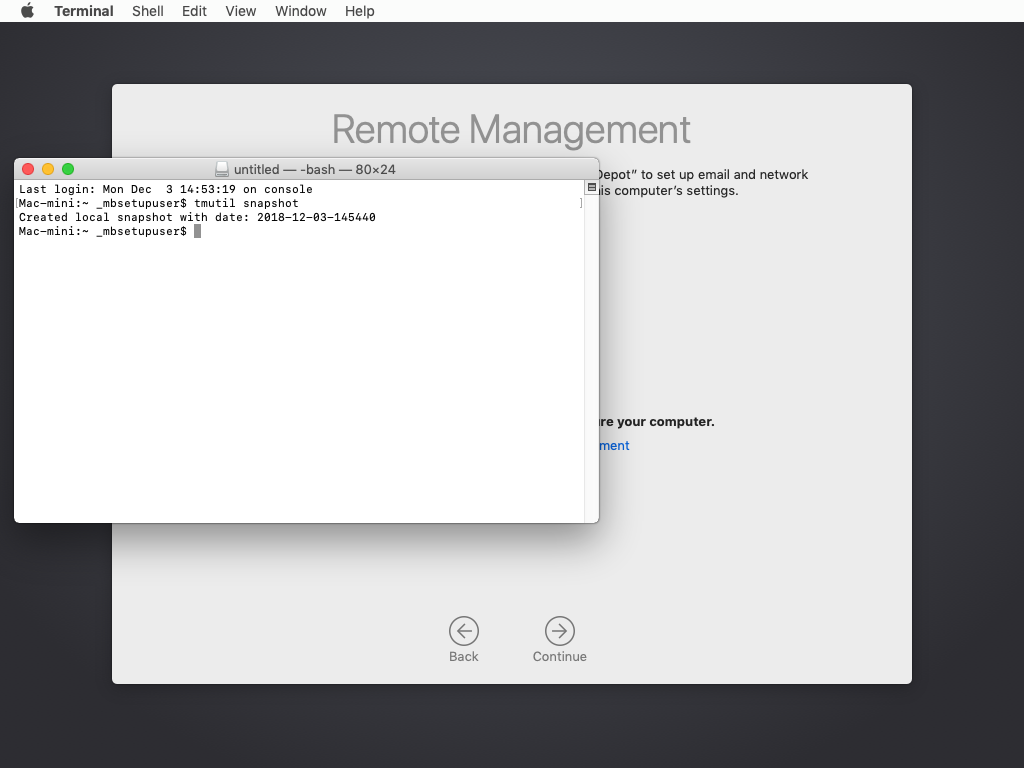
3. Stop here and don't progress in Setup Assistant any further. Type Ctrl+Option+Command+T and a Terminal window will appear.

4. In the Terminal window, enter tmutil snapshot. APFS's tmutil will make a snapshot of the Mac in that state, within Setup Assistant, before doing any system configuration. Once you see a confirmation that the snapshot was created, continue Setup Assistant and do whatever testing you require.
5. When you're finished with your testing, reboot the Mac into Recovery.
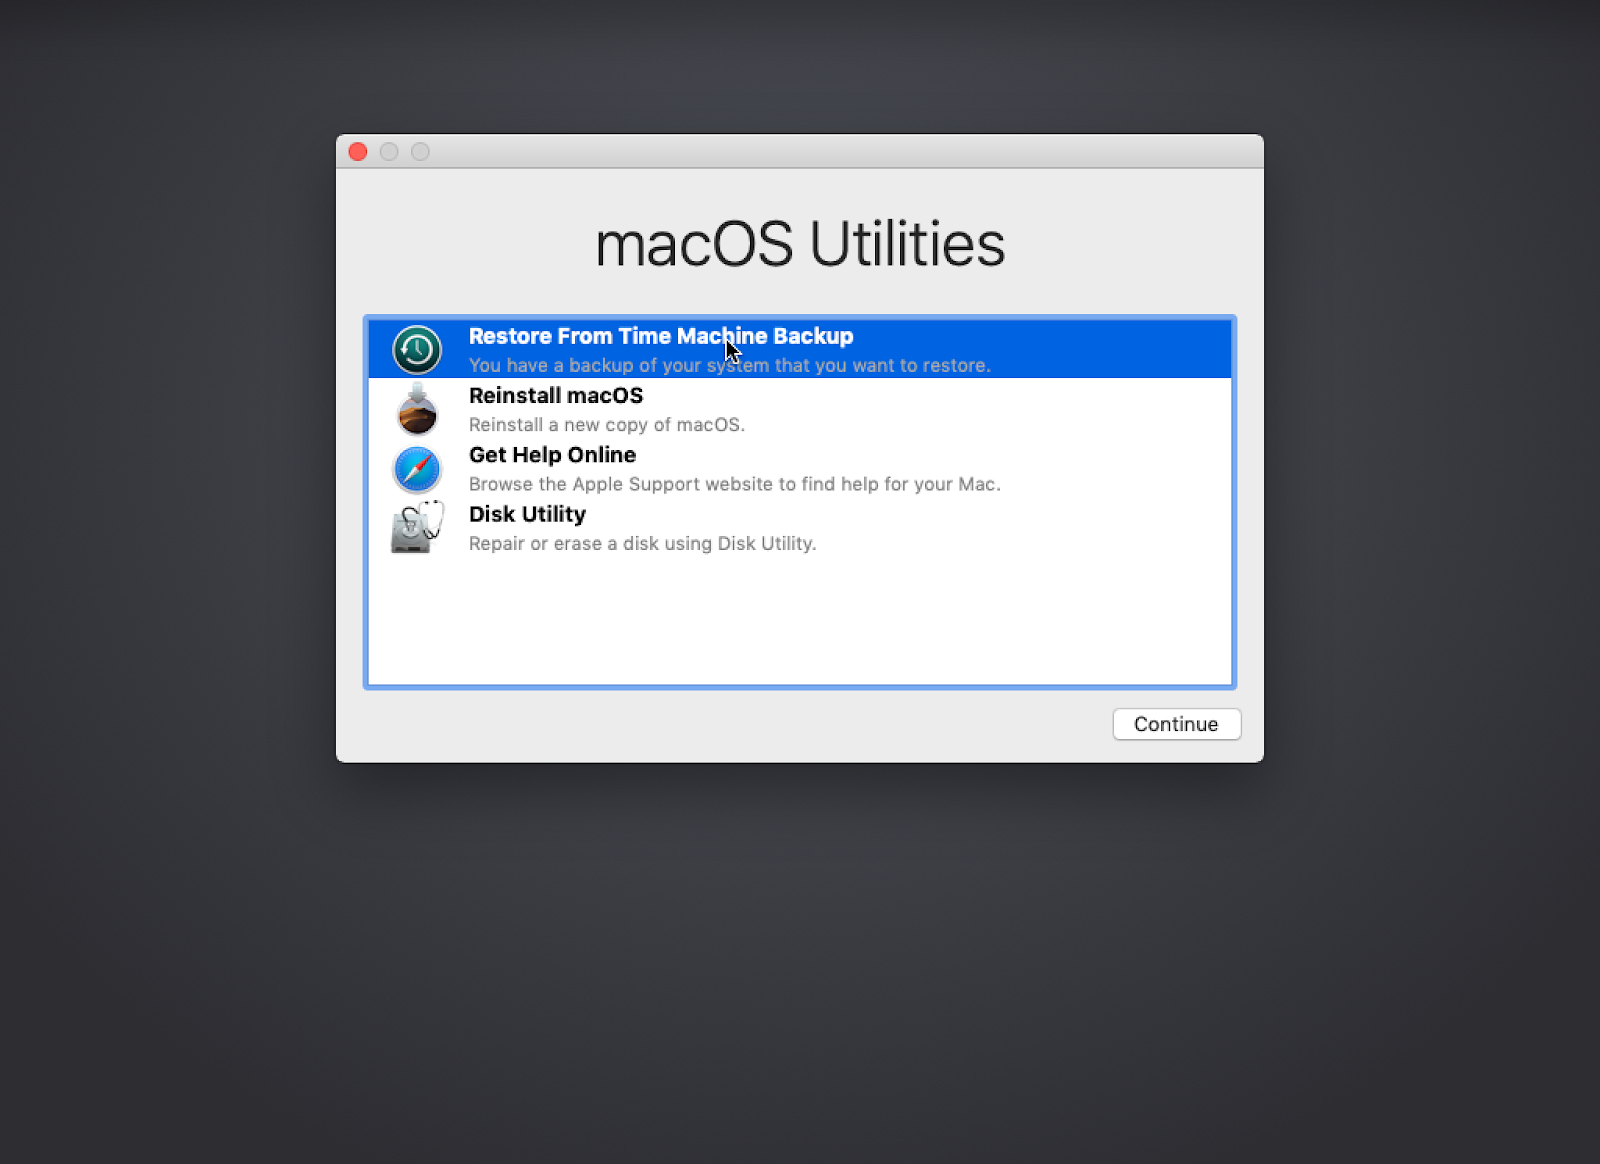
6. In the macOS Utilities window, select Restore From Time Machine Backup.
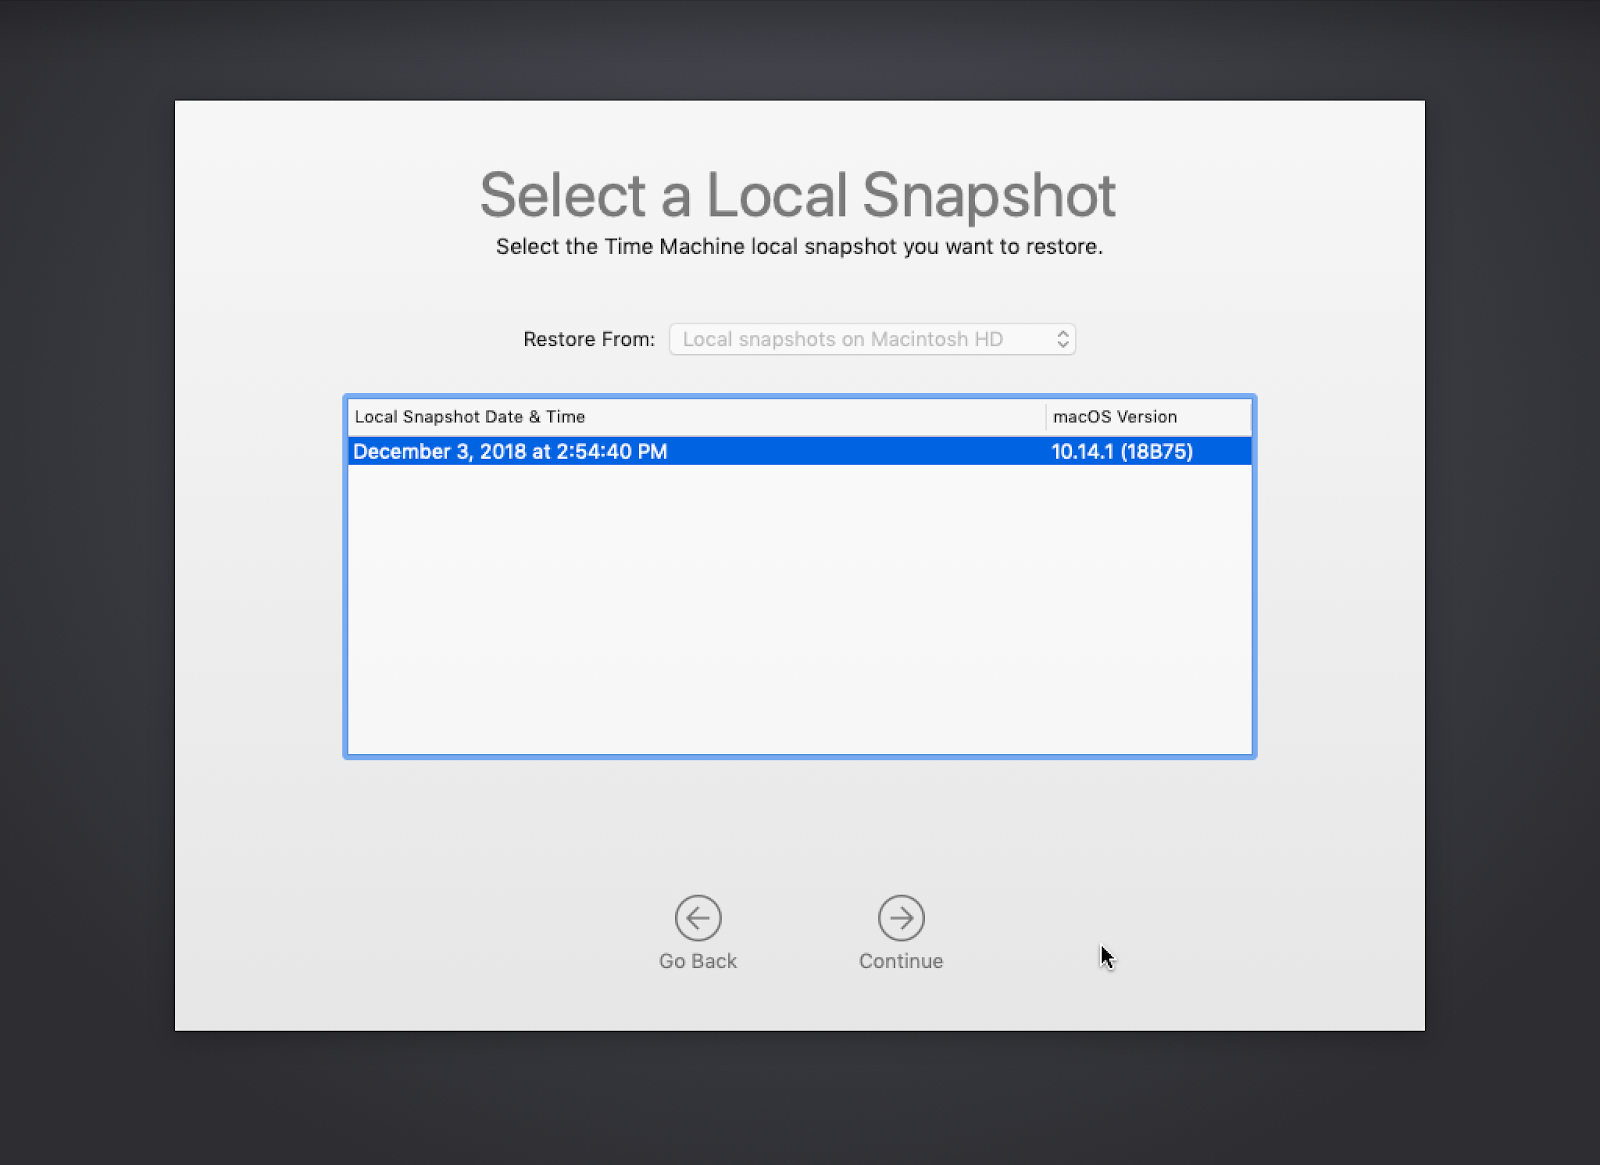
7. Click Continue when prompted. On the next screen, choose your Macintosh HD drive where the local snapshot resides.
8. The local snapshot you took previously should appear in this list. Select it and click Continue.
9. When you select your snapshot you'll get a warning about how all current contents will be lost. Since that's what we want in this situation, click Continue. Time Machine will then restore to the local snapshot you selected. This process takes a few seconds.
10. Once the restore is complete, the Mac will automatically reboot. You'll then return to the beginning of Setup Assistant back at a vanilla state. Don't forget to delete the computer record from your MDM so that whatever PreStage you have configured will think it's a new computer and run again.
And that's all there is to it! Just a few things to remember as you try out this testing workflow:
Fortunately there is an easy way to quickly reset a Mac to a blank state without wiping the drive and reinstalling the full OS. As long as you're testing on an APFS Mac (so, High Sierra or Mojave) you have the tmutil command available to quickly make snapshots that you can use to restore to within 24 hours. And you can run tmutil from the Terminal in Setup Assistant, which means you can get yourself back to a true vanilla state of the OS without reformatting by doing the snapshot before you even get through all of Setup Assistant.
Here's what that looks like:
1. Start with a fresh Mac that hasn't gone through Setup Assistant yet. You can get it in this state however you prefer; the native option here is to boot into Recovery, wipe the drive, and reinstall macOS fresh.
2. Boot up the Mac and let it start Setup Assistant. Select your region and keyboard.
 |
 |
3. Stop here and don't progress in Setup Assistant any further. Type Ctrl+Option+Command+T and a Terminal window will appear.
4. In the Terminal window, enter tmutil snapshot. APFS's tmutil will make a snapshot of the Mac in that state, within Setup Assistant, before doing any system configuration. Once you see a confirmation that the snapshot was created, continue Setup Assistant and do whatever testing you require.
5. When you're finished with your testing, reboot the Mac into Recovery.
6. In the macOS Utilities window, select Restore From Time Machine Backup.
7. Click Continue when prompted. On the next screen, choose your Macintosh HD drive where the local snapshot resides.
 |
 |
8. The local snapshot you took previously should appear in this list. Select it and click Continue.
9. When you select your snapshot you'll get a warning about how all current contents will be lost. Since that's what we want in this situation, click Continue. Time Machine will then restore to the local snapshot you selected. This process takes a few seconds.
 |
 |
10. Once the restore is complete, the Mac will automatically reboot. You'll then return to the beginning of Setup Assistant back at a vanilla state. Don't forget to delete the computer record from your MDM so that whatever PreStage you have configured will think it's a new computer and run again.
And that's all there is to it! Just a few things to remember as you try out this testing workflow:
- Local snapshots are only stored for 24 hours. Periodically remind yourself to take new local snapshots after you do a restore so you don't lose it and have to do a manual wipe again.
- If you're using this for DEP testing, make sure you delete the computer record in your MDM before you do a fresh enrollment. If you don't, your MDM may think the computer already got the PreStage (it technically did) and not run through the PreStage again.
gl;hf
Write a comment
Post a Comment